


[ad_1]
For over a decade, one of our renovation mantras has been “no meaning in the middle’. Basically, if your house is mid-level, underfurnished, or in distress, don’t worry. Take your time, try a few things, and find the right direction as you go. See what you like, use What. Living with something for a while (or a long time). The expectation of having the perfect house immediately, then throwing it in the trash (we always take years to get to that point!) Just keep developing the space in a way that works for your family and makes you happy. Eventually, you’ll likely end up with something you love and find it useful.
This particular corner of our bedroom is a perfect example of this spell…especially since it gets really weird in the middle (among others).
First, let’s rewind a bit, because the boy has come a long way in this corner. This is what it looked like three years ago when we first moved in. The best way to describe this furniture arrangement is “Work with what you have.“At the time, we planned to build a closet there in the future (you can see presented in this article), but we ended up putting a Larger Closet Systems elsewhere). Again, this is a great example of how to live with an idea for a while and correct course as you go.
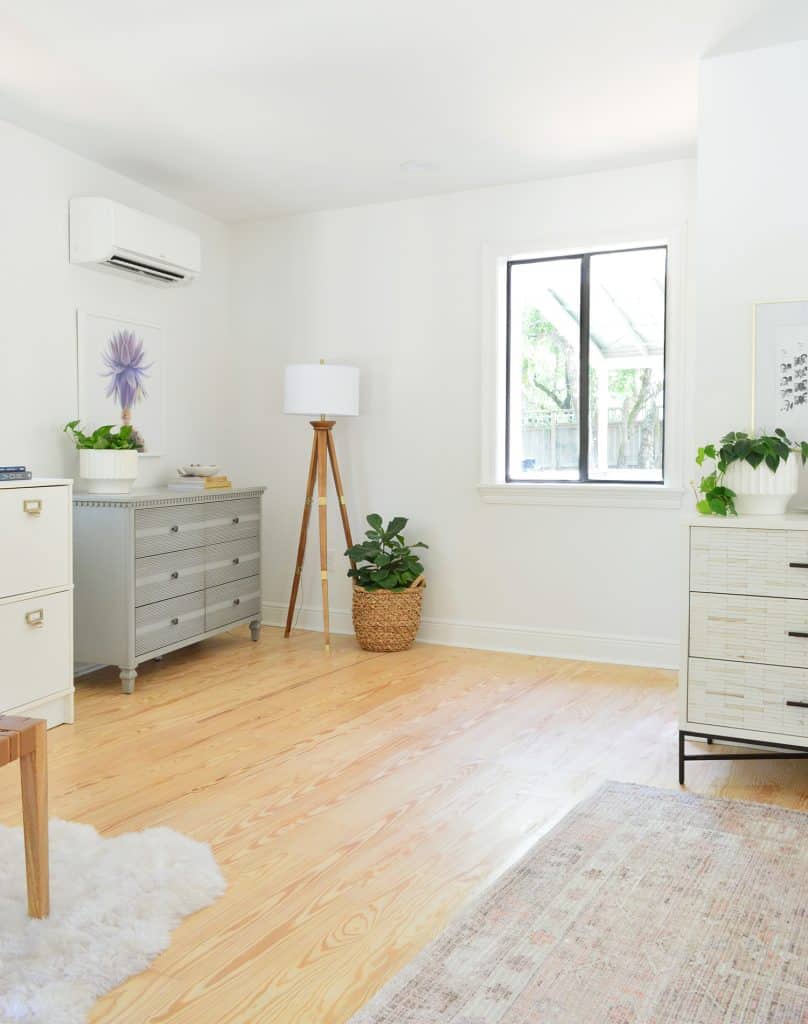
To better guide you, the left side of the photo above is the same wall where our bedroom fireplace is. See that gray dresser cut out in the lower right corner? This is the same one shown in the picture above.
This is an interesting corner to work for for several reasons. The first is that the walls do not meet at right angles (you will see this more clearly later in this article). This is a very sharp angle. There is no angle anywhere near 90 degrees (or 98 degrees, RIP). The second factor is that it is clearly visible from our kitchen/lounge area. It’s always fun for guests to look straight into our bedroom, so we tried to make it look as non-bedroom as possible. Here is the moved view:
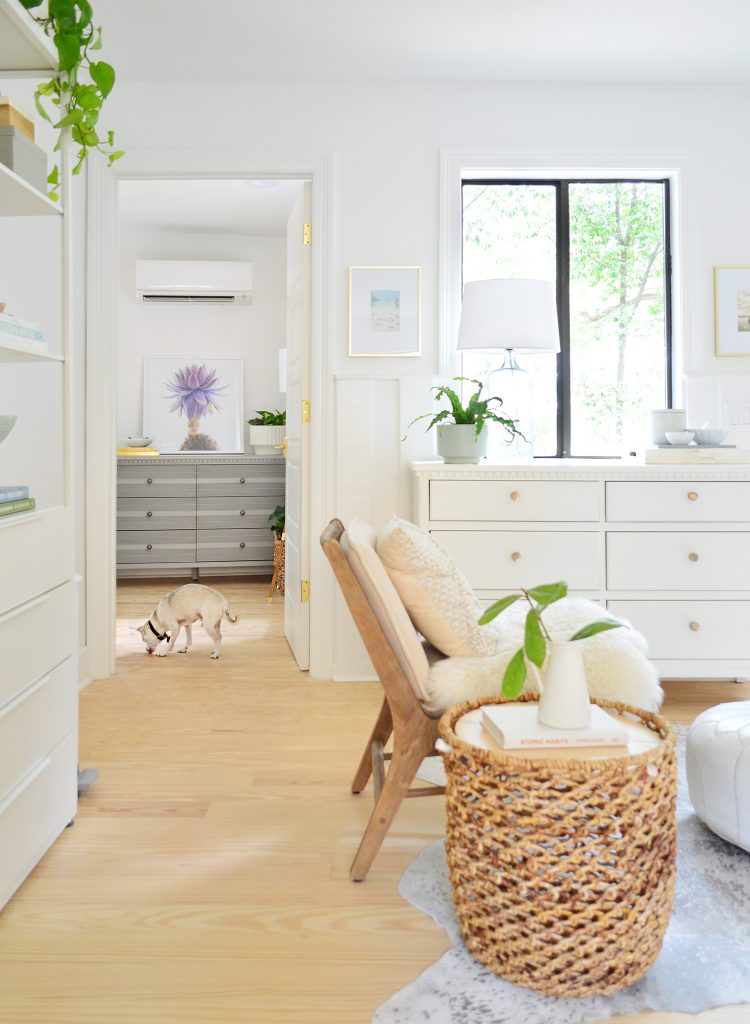
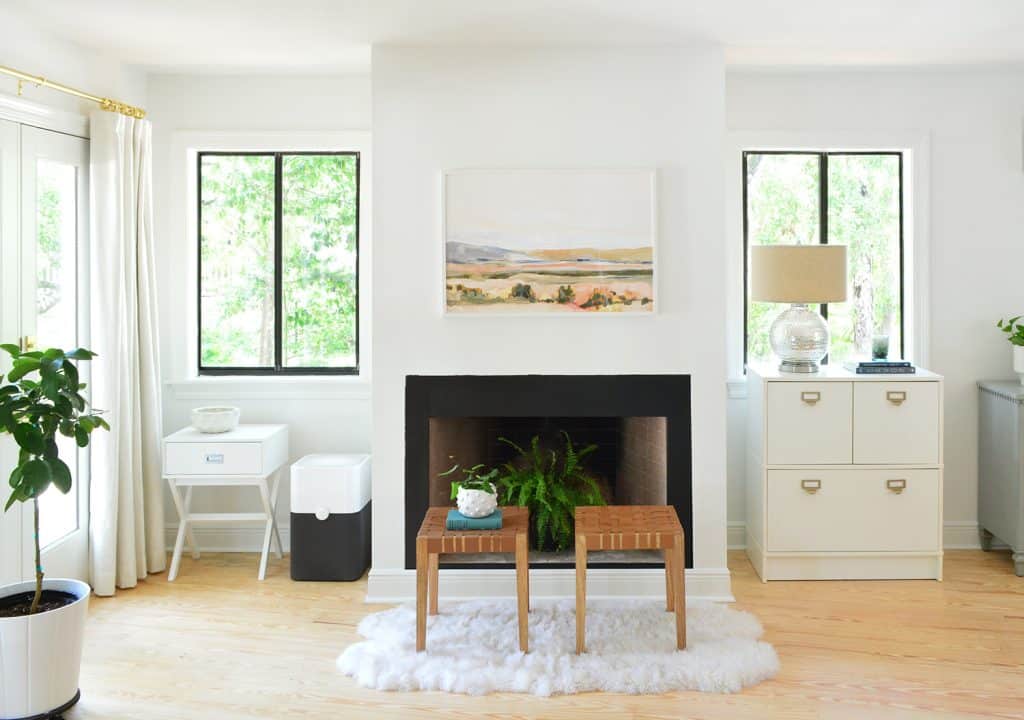
You probably also know this nook, because we later decided that this place would work well as a second bathroom if we decided we needed one of the bathrooms. We’ve shelved that plan (maybe forever – For more related content please click here) but for a while the thought of that could be in the future terrified us from doing anything better with that corner because we feared “if it’s the bathroom everything will change later so why bother .” For example, when we install These Built-Ins Around Our Fireplaceswe didn’t go full wall to wall on the right side, assuming we’ll end up adding a wall there, that’s where the future bathroom will be.
So for a while, this corner was like that. The dresser itself looks pretty good if we stand close enough to be seen only from the doorway…
…but this little “moment” doesn’t mean much in the context of the room as a whole.
Even if you walk a little to the right of the doorway from the lounge area, the dresser sits next to the built-in cabinets, which looks a bit odd.
Is this the end of the world? No! We lived like this for about a year.Eventually we found out that we were “reserving” this corner for a potential future bathroom plan which was becoming The odds are getting smaller every day…so this pushes us to think more about what we really want from that corner in the present moment, rather than waiting for something more useful from that place in the distant future.
It felt great to consider some other more permanent solutions for this space. If we decide we suddenly want that bathroom or something in 2029 (cabinets+shelves are hardly a permanent installation), nothing is undone in a day. This brings us to a solution we like because (1) it looks good from the kitchen/non bedroom and (2) it adds a lot of functional storage (concealed and open).
There are almost three main elements to this change:
- we extended IKEA Besta Cabinets so they’re really wall to wall
- We use pruning and mesa (so worth the effort for a custom look)
- We add 3 long floats IKEA lacks shelves on top of them
We considered a few other things (for example, a more elaborate built-in kitchen with a glass top), but in the end, we like the clean and modern look of the nook now. It also feels like it’s going to serve us for a long time (if you bet, I bet we’ll never add a bathroom).
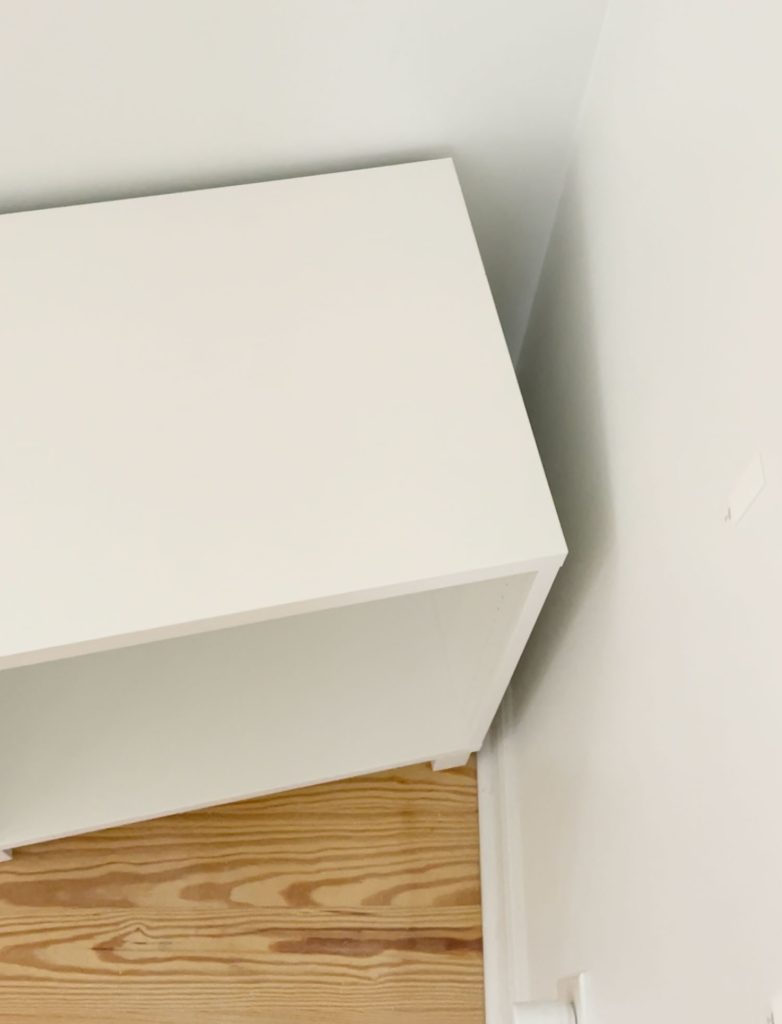
We got really lucky that IKEA’s stock Besta was the perfect size for this wall. This feels like a small miracle because, as you can see below, the walls meet at that extruded non-90 degree angle.Since they fit so well, we can immediately gain another 70 inches of storage space (!!) by introducing three more cabinets, and simply repeat the same steps we used earlier Make Besta cabinets look like they’re built-in (Add base plate, fill gaps, top butcher block).
If you scroll up a picture, you can see how the counter expands to fill in that weird extruded corner, instantly making the area look less “off” (and you can see that in the video Shirley recorded for you later See more on that corner) post). Wall to wall countertops can solve tons of weird wall/corner problems! Don’t worry, that end cabinet is still wide enough to get items in and out.
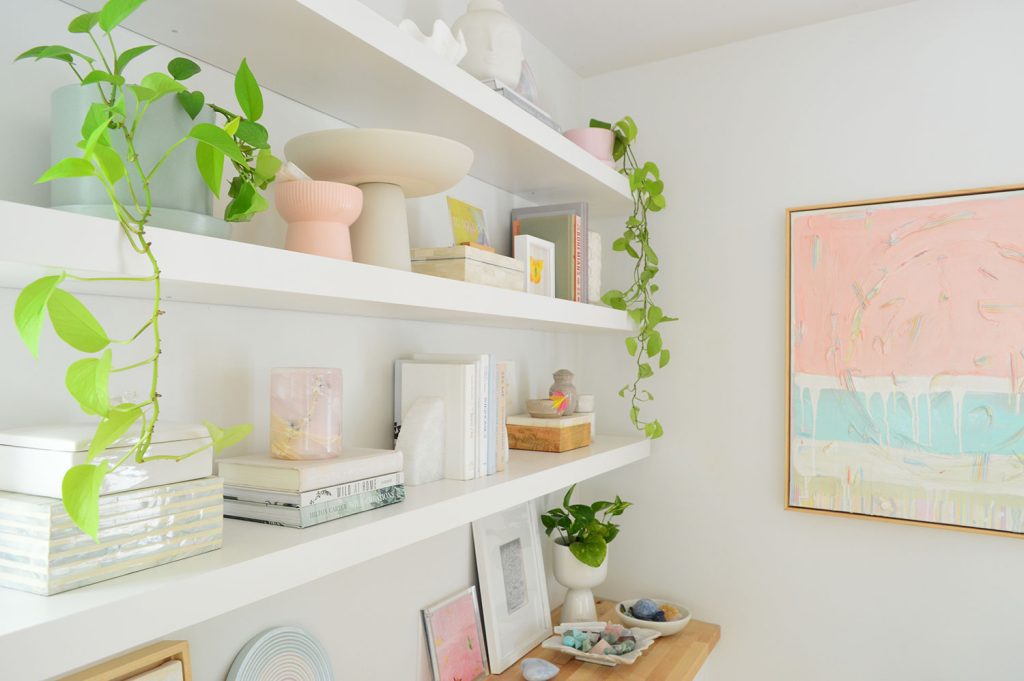
In fact, the cabinet you see above holds everything that was in the previous blue inlaid dresser – which means we gain two extra cabinet spaces here with this move… not to mention our Vertical storage space gained through three shelves. on top of them!
When it comes to these shelves, we took a highly scientific approach to figuring out what to do above newly installed cabinets/counters. We purchased three 72″ floating shelves and didn’t immediately hang all three. Thanks to the combination of lifting things up, putting painter’s tape on the wall, and painting over photos on Instagram (again, high Science) We decided to use all 3 at the same time.
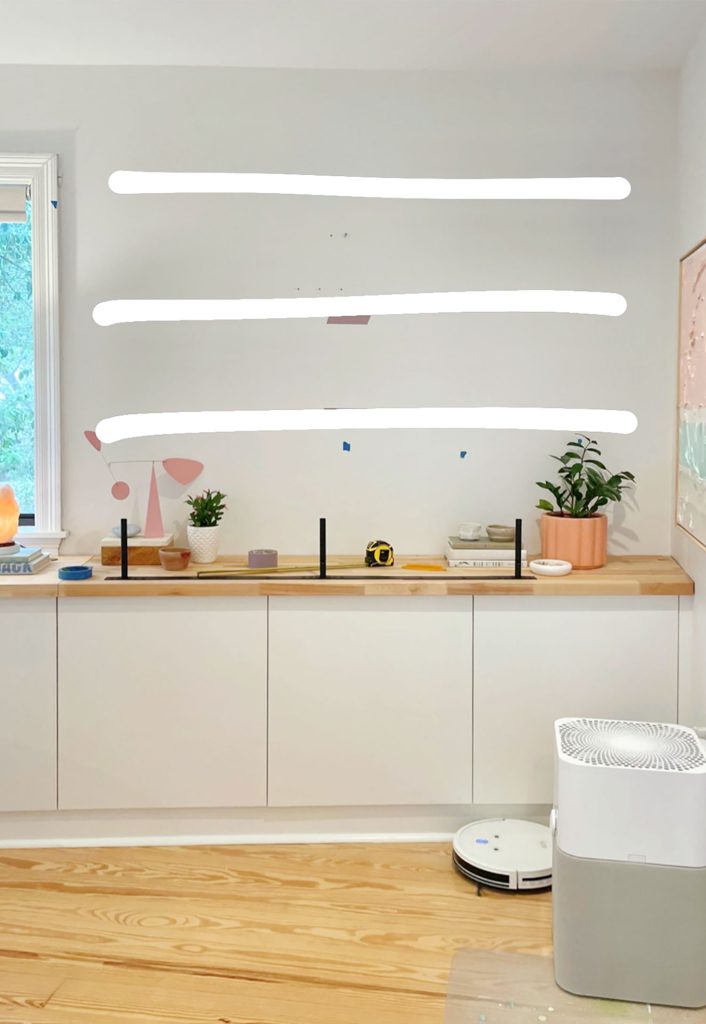
Three feels like it fills the space well without making each shelf too cramped or too spaced out. Plus, there’s just enough room here for the items we want. We already have two tall bookshelves upstairs with lots of books, so we like to use those for some books, but also mix in plants, art, and other items that we love and want to see every day.
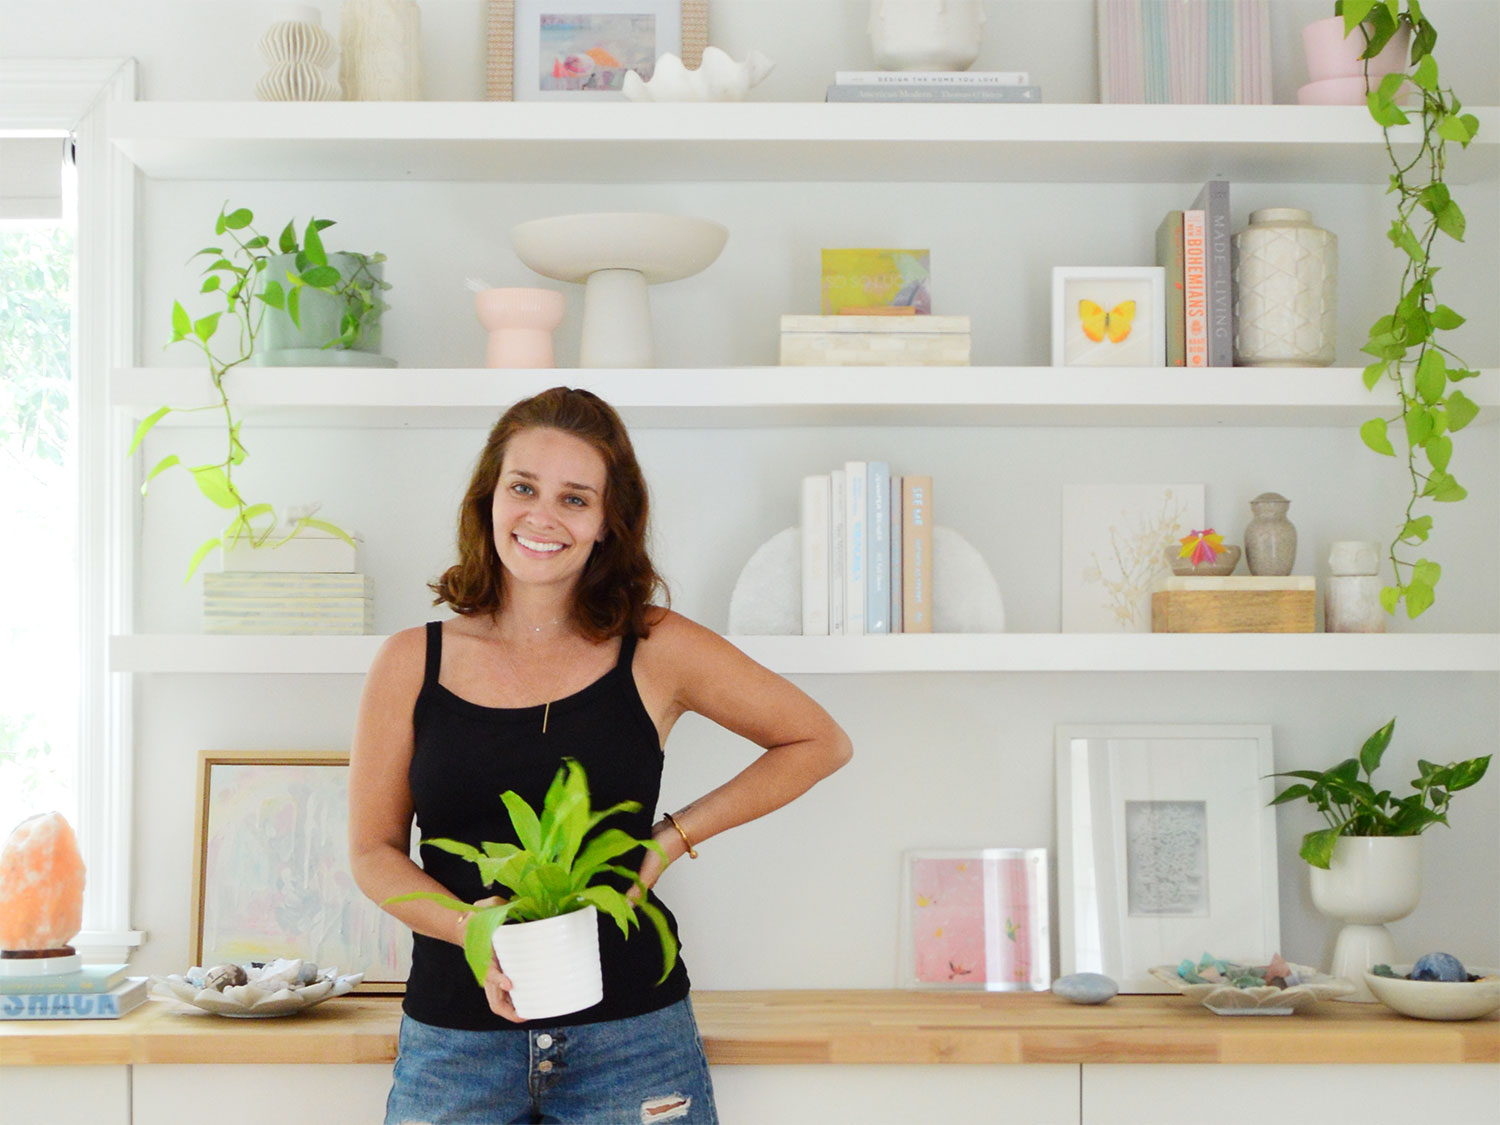
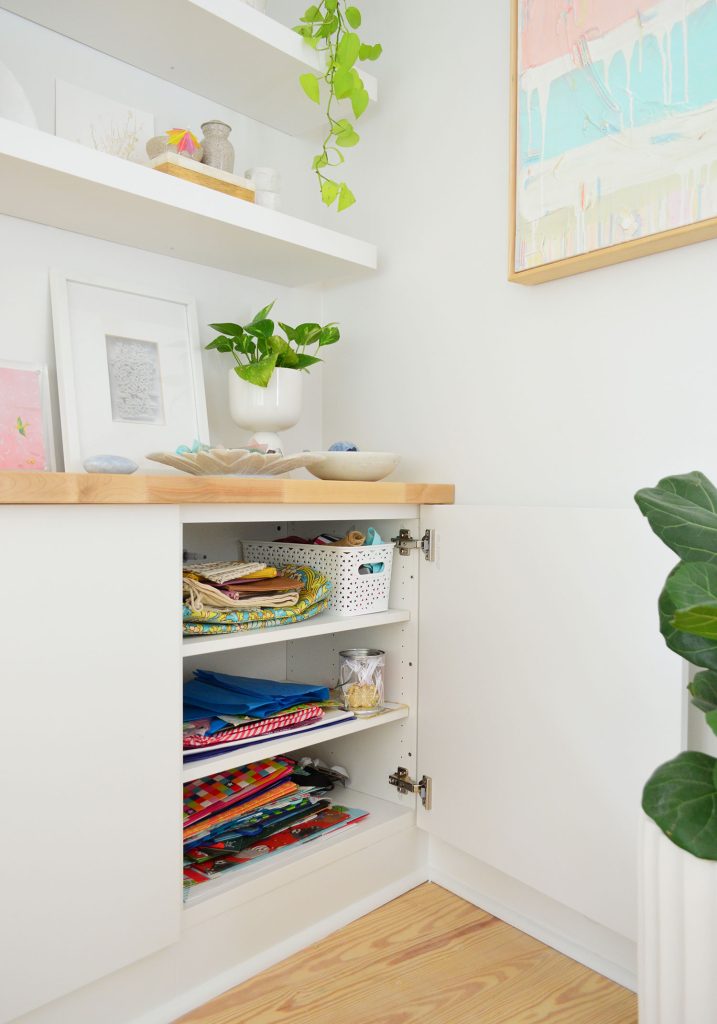
Since I mentioned the other two bookshelves upstairs, here they are. As you can tell, we love adding art + plants to our bookshelves. They are IKEA Fjalkinge bookshelf units (yes, more like IKEA!) and before you post us the book police, while those shelves do have about 50 of our most beautiful hardcover books, we also have a whole set of Besta for our room fireplace The side cabinet is filled with our favorite paperbacks and other books.
Well, back to the bedroom and see how we pull off this simple update. People on Instagram often ask Sherry what drywall anchors we use for projects like this.For a load bearing frame like this, it’s best to install at least one or two studs (as many as possible, really) but these 75lb EZAncor Anchor Also great for when you can’t hit the studs. They’re super easy and quick to install, which is why they’re our go-to wall anchor.we used These precise anchors Hang these shelves and they’re not going anywhere.
Remember what we’re aiming for here: more space for hidden storage and pretty things we love to look at + a view that doesn’t scream “this is our bedroom!” from the door. So we’re very happy to finally have a product that meets all of these criteria. Also, have you ever come across a shelf that Sherry doesn’t like styling? I don’t.
Also, for those who worry about what Shirley can get to (somehow she always gets asked), she has easy access to anything on the bottom two shelves, and she married me specifically because of my The long arm can reach the top shelf 😉 We also have chairs. There is also a step stool.
This video is for anyone who wants to see the entire bedroom and see how this new corner solution fits into the room (and how nice the view is from the kitchen door we entered through!). It explains in detail how we increased the height of the entire room to draw the eye (the bookshelf balances out some other items in the room that have height), and you can see how much storage we gained thanks to her very active index finger:
NOTE: You can also Watch this video on YouTube.
In order to complete this article completely, I would like to write another article before and after. Remember this view at the top of the post? Since we moved in?
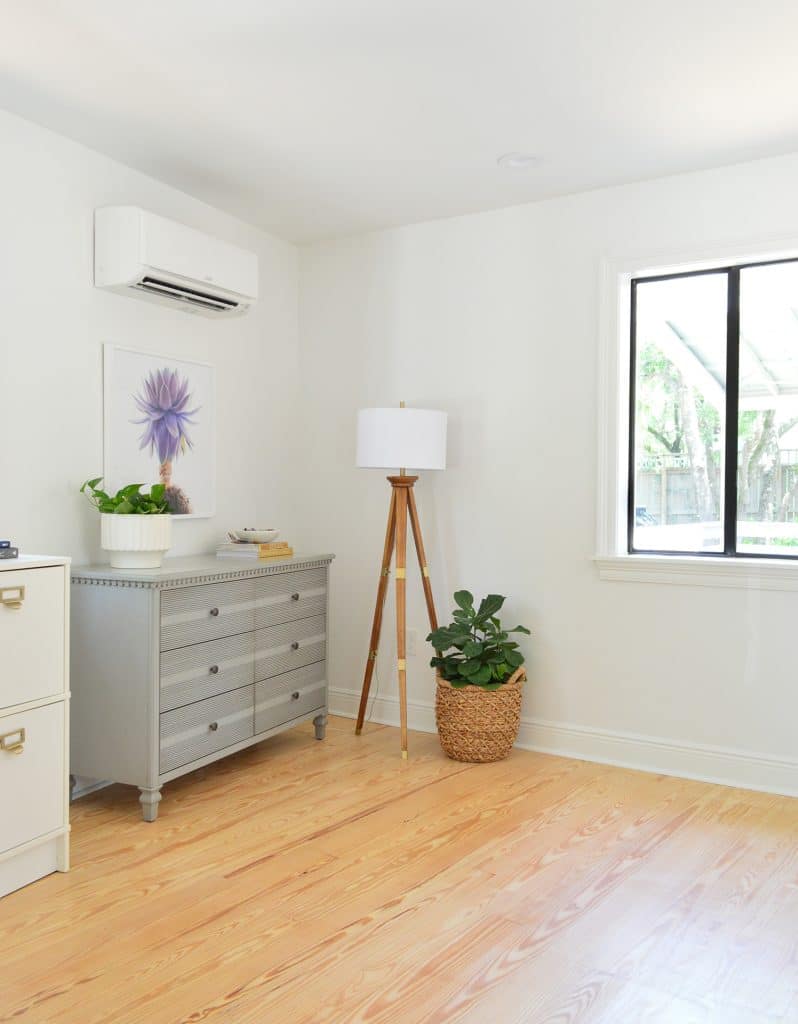
Now it looks like this (if you’re wondering where that mini split went, this post will be filled in for you).
It’s great to be able to “understand” this place that has been stuck for almost three years. It’s more comfortable for the eyes and more functional for us. Not only did we get two Besta cabinets for storage (and three floating shelves for vertical storage), but we had complete peace of mind knowing that if we changed our minds again, nothing was that expensive (yay IKEA!) or permanent ( Yes, a screwdriver) We can’t undo it later.
More Floating Shelf Items
If you’d like to see more floating shelves that we’ve added (or built yourself!), here are some other posts that might help you find a good solution for your space:
*This article contains affiliate links, so we may earn a small commission at no additional cost to you when you make a purchase through a link on our site.